Technology Windows To Go is officially described in article Windows To Go: Feature Overview. We will use little trick and create USB media with server operating system. What we will need:
- computer with Windows 8 OS
- ISO file of Windows 8
- ISO file of Windows Server 2012
- Flash disk or USB hard drive with 32 GB or more
In this example we want to create Windows Server 2012 Standard (with GUI) on external USB hard drive. We have ISO files:
- Windows 8 -
en_windows_8_enterprise_x64_dvd_917522.iso - Windows Server 2012 -
en_windows_server_2012_x64_dvd_915478.iso
Step by Step process
Prepare source files
Extract both of ISO files to C:\GO.
Modify WIM file of Windows Server 2012
Now we have to select which version of Windows Server we want to use. We can do it by editing WIM file.
- Run CMD.exe as administrator
- By using next command we can see all versions of Windows Server 2012 which WIM file contains
C:\>dism /Get-WimInfo /WimFile:C:\GO\en_windows_server_2012_x64_dvd_915478\sources\install.wim

Deployment Image Servicing and Management tool
Version: 6.2.9200.16384

Details for image : C:\GO\en_windows_server_2012_x64_dvd_915478\sources\install.wim

Index : 1
Name : Windows Server 2012 SERVERSTANDARDCORE
Description : Windows Server 2012 SERVERSTANDARDCORE
Size : 7 195 580 708 bytes

Index : 2
Name : Windows Server 2012 SERVERSTANDARD
Description : Windows Server 2012 SERVERSTANDARD
Size : 11 999 848 937 bytes

Index : 3
Name : Windows Server 2012 SERVERDATACENTERCORE
Description : Windows Server 2012 SERVERDATACENTERCORE
Size : 7 176 243 455 bytes

Index : 4
Name : Windows Server 2012 SERVERDATACENTER
Description : Windows Server 2012 SERVERDATACENTER
Size : 11 995 224 677 bytes
- We can see that first version (index 1) is Windows Server 2012 Standard Core and we need Standard version with GUI, which is Index: 2 SERVERSTANDARD. We can delete all images (Indexes) besides that you want to install (or should be enough to delete all preceding indexes).
C:\>Dism /Delete-Image /ImageFile:C:\GO\en_windows_server_2012_x64_dvd_915478\sources\install.wim /index:1

Deployment Image Servicing and Management tool
Version: 6.2.9200.16384
Note: after we delete Index:1 we should run Get-WimInfo again because the sequence change
C:\>dism /Get-WimInfo /WimFile:C:\GO\en_windows_server_2012_x64_dvd_915478\sources\install.wim

Deployment Image Servicing and Management tool
Version: 6.2.9200.16384

Details for image : C:\GO\en_windows_server_2012_x64_dvd_915478\sources\install.wim

Index : 1
Name : Windows Server 2012 SERVERSTANDARD
Description : Windows Server 2012 SERVERSTANDARD
Size : 11 999 848 937 bytes

Index : 2
Name : Windows Server 2012 SERVERDATACENTERCORE
Description : Windows Server 2012 SERVERDATACENTERCORE
Size : 7 176 243 455 bytes

Index : 3
Name : Windows Server 2012 SERVERDATACENTER
Description : Windows Server 2012 SERVERDATACENTER
Size : 11 995 224 677 bytes
- Continue until we have just Index: 1 SERVERSTANDARD
C:\>dism /Get-WimInfo /WimFile:C:\GO\en_windows_server_2012_x64_dvd_915478\sources\install.wim

Deployment Image Servicing and Management tool
Version: 6.2.9200.16384

Details for image : C:\GO\en_windows_server_2012_x64_dvd_915478\sources\install.wim

Index : 1
Name : Windows Server 2012 SERVERSTANDARD
Description : Windows Server 2012 SERVERSTANDARD
Size : 11 999 848 937 bytes
- Exit CMD
Create Windows To Go media
- Connect our USB disk to Windows 8 PC
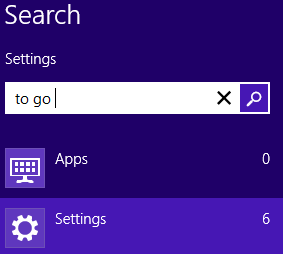
- Go to Search and type
to go, under Setting we can see Widows To Go and we run it


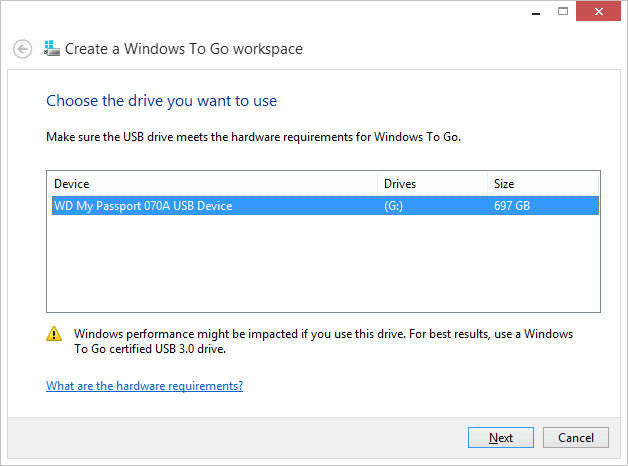
- It open wizard Create a Windows To Go workspace and start to looking for your USB device

- Select our device and click Next
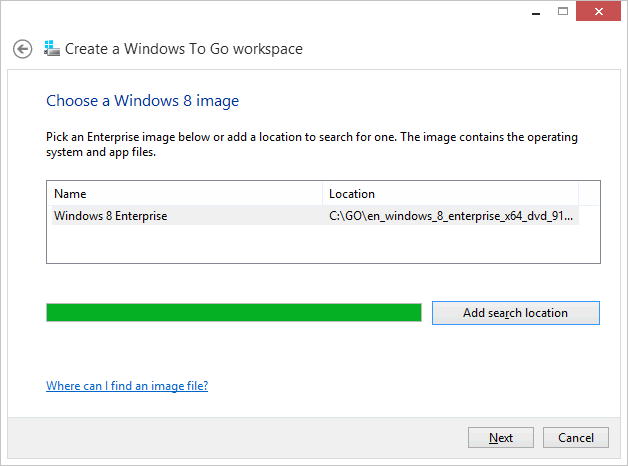
- Click Add search location and select our Windows 8 extract folder, then click Next

- In BitLocker option we select configuration we want to use (in this example use Skip)
- Now it is a time for small hack, in Windows Explorer we go to our extracted Windows Server 2012 folder and move our modified
install.wimfile to extracted Windows 8 folder. It means move
C:\GO\en_windows_server_2012_x64_dvd_915478\sources\install.wim to C:\GO\en_windows_8_enterprise_x64_dvd_917522\sources\install.wim
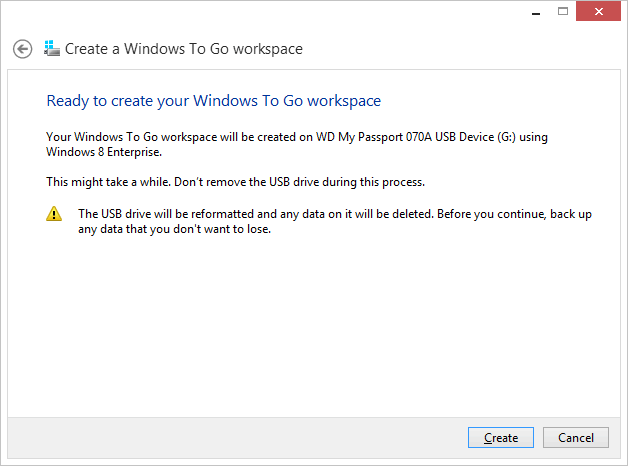
- Last step is to confirm all by clicking to Create button and media Windows Server 2012 To Go start to be created

After process is complete, just plug our USB device to our favorite PC and enjoy our Server To Go.
Note: there are some features which are not working in Server To Go, like if we unplug USB device with OS during server is running and plug it back, the server crash.
Komentáře
Windows To Go Certified Devices technet.microsoft.com/en-us/library/f82d1a0a-d8f7-4e8a-86a6-704166969a42#wtg_hardware