
Note: The description in this article was tested on Veeam Backup & Replication 13.0.2, licensed using the Veeam Universal License (VUL), i.e. the equivalent of Enterprise Plus.
This article will be followed by a continuation, Veeam Backup & Replication - VM migration using replication, which describes Failover in more detail and the use of replication for migrating Hyper-V VMs between two different clusters.
Replication in Veeam Backup & Replication
Replication is a technology that creates an exact copy of a virtual machine in the native virtualization format on a target host. Veeam Backup & Replication (VBR) keeps the copy (replica) synchronized with the source VM. Replication ensures a minimal recovery time objective (RTO) in the event of a disaster, because VM replicas are in a state ready for immediate startup. A replica is a standard, fully functional VM.
How replication works
VBR reads the VM from the production (source) host and transfers changes to the target host (typically at a DR site). At the target, a VM is created and maintained in a stopped state (Replica VM), which has its own set of restore points (snapshots). The transfer of changes is done incrementally using Hyper-V RCT (Resilient Change Tracking) or VMware CBT (Changed Block Tracking).
Advanced features
Veeam allows the use of several special features as part of replication
- Replica from source / backup - can read data for the replica from the production virtualization server (default) or from a backup (saves production I/O)
- Replica seeding - the data of the first full synchronization is transferred by another method (if we have a slow link)
- Network remapping - changing networks (VLANs) for the replicated VM
- Replica re-IP - changing IP addresses for the replicated VM (only supported for Windows OS)
- Failover Plan - orchestration of failover for multiple VMs in a defined order
Where we can use replication
Veeam Backup & Replication supports replication for VMware vSphere and Microsoft Hyper-V. This article focuses on Hyper-V, but functionally it is very similar in the case of VMware as well.
Replication serves primarily to protect critically important VMs, which in the event of a disaster we can start on another host, cluster, or site (where we create the replica). In practice, I have used replication for a different purpose, namely migrating a VM between separate Hyper-V clusters managed by different System Center Virtual Machine Manager (SCVMM) servers.
Virtual Machine Replication Job
First we will describe the general creation and configuration of a replication job. For configuration we use the traditional thick client Veeam Backup & Replication Console.
- Veeam Backup & Replication Console
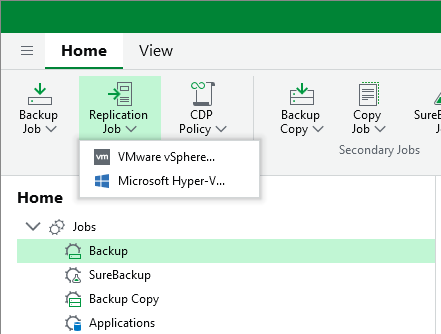
- Home - Jobs - Replication Job - we select the platform, in the example Microsoft Hyper-V
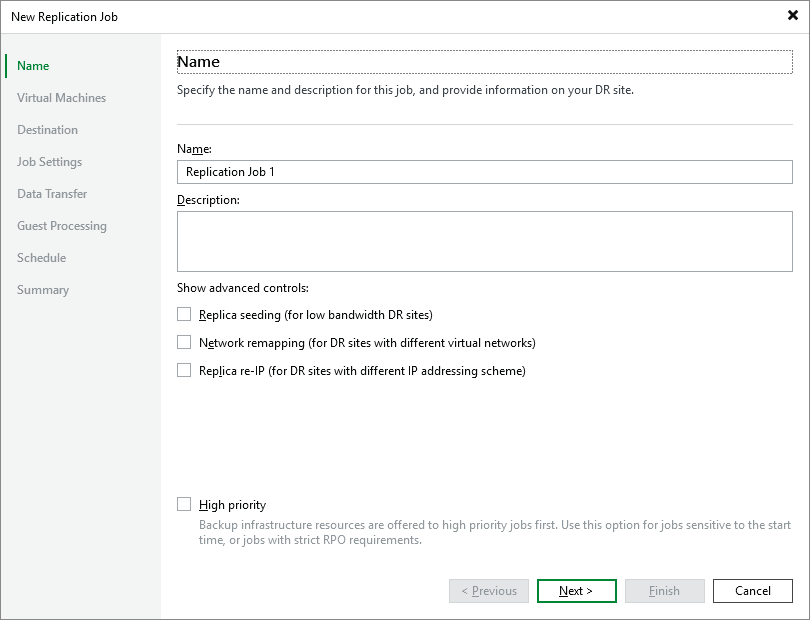
- Name - we enter a unique name, optionally also a description, here we can activate special options Replica seeding, Network remapping, and Replica re-IP, which will be added to the wizard
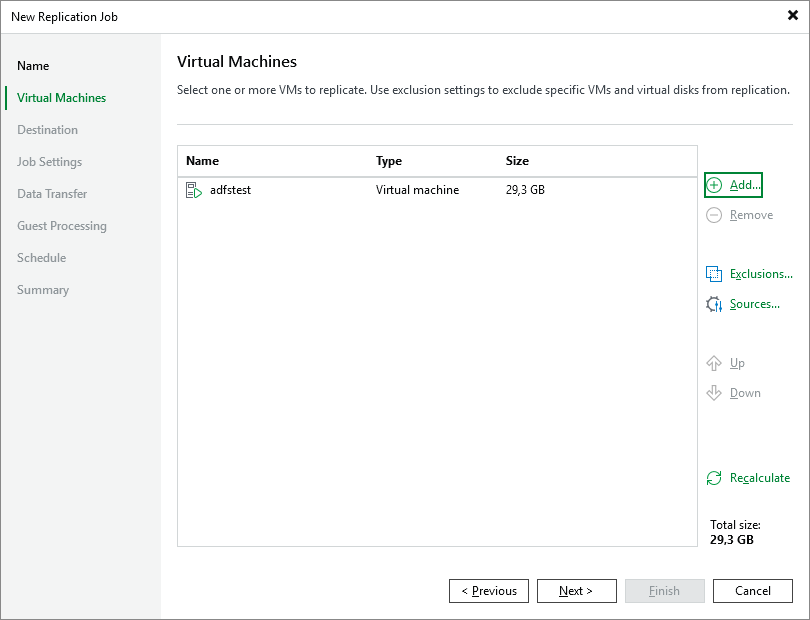
- Virtual Machines - we add the virtual machines (the Add button) that we want to replicate, we can select individual VMs or VM containers (servers, clusters, storage, tags, etc.), if a new VM is added to the container, it will automatically be added to the job
- when adding, we can switch views in the toolbar (in the top right corner) to see certain objects, we can also search by name (which is usually the fastest)
- we can use Exclusions to exclude certain VMs or VM disks from the backup
- individual VMs are processed sequentially, we can adjust the preferred order (using the Up, Down arrows)
- by clicking Sources we can select the data source for replication, either From production storage (current state of the VM) or From backup files (the latest available backup in the selected backup repository will be used)
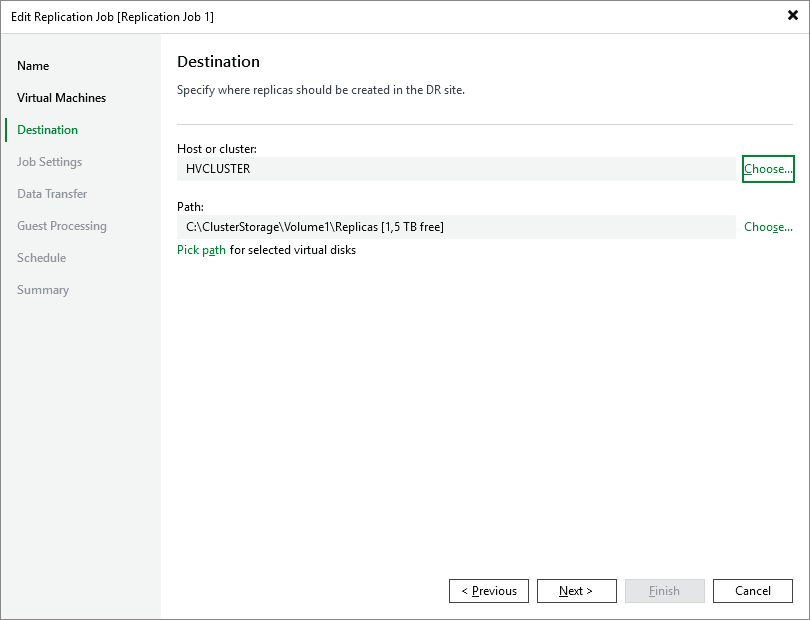
- Destination - we select the Host or cluster where the VM (replica) will be registered, and enter the Path (for Hyper-V) with the path to the folder where the VM files will be stored (a subfolder for the VM will be created), this can be a folder on the host server, a CSV (Cluster Shared Volume), or an SMB3 shared folder, using Pick path for selected virtual disks we can select different paths for different VMs
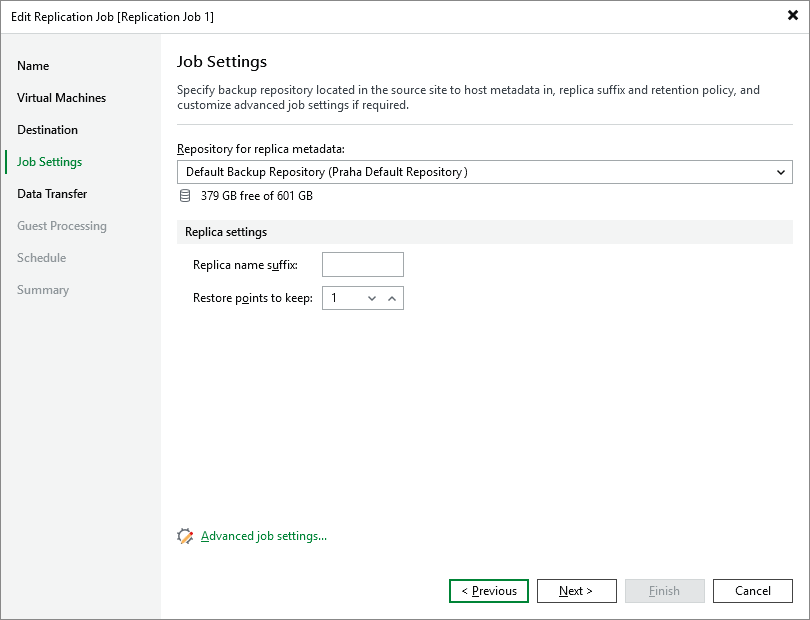
- Job Settings - we set the job parameters
- Repository for replica metadata - we select a repository (close to the source, since small data is intensively written and read during the job, deduplication or object storage and SOBR are not supported, and a Hardened Repository is not entirely suitable) where the metadata for replication will be stored
- Replica name suffix - we can enter a suffix that will be added to the source VM name when registering on the target server (so that the name is unique and easily identifiable), we don't have to enter anything and the name will be the same as at the source
- Restore points to keep - the number of restore points (snapshots are used) that the replication keeps, we can enter 1 to 28
- Advanced Settings - advanced replication settings, the Traffic section (option to exclude swapfile blocks, deleted files, compression, storage optimization), Notifications, Hyper-V Settings, Script
- Data Transfer - we choose the Source proxy, which for Hyper-V can be On-host backup or Off-host backup, and the data transfer method, either direct (Direct) or using a WAN accelerator
- Guest Processing - the source VM and supported applications can be brought into a consistent state before replication using Veeam services
- Schedule - we can schedule the job to run regularly (the other option is to run it manually)
Hyper-V cluster certificate error
During the first test, I immediately ran into a problem. I selected a Hyper-V cluster as the target of the replication job. The path did not load, and when clicking on the selection (Choose Path), an error was displayed:
The remote certificate was rejected by the provided RemoteCertificateValidationCallback
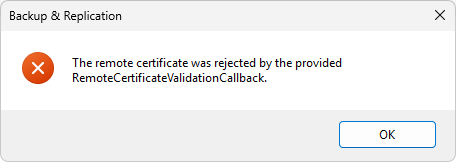
The cause was that the Veeam Backup & Replication server did not trust the cluster's certificate. The solution is simple.
- Veeam Backup & Replication Console
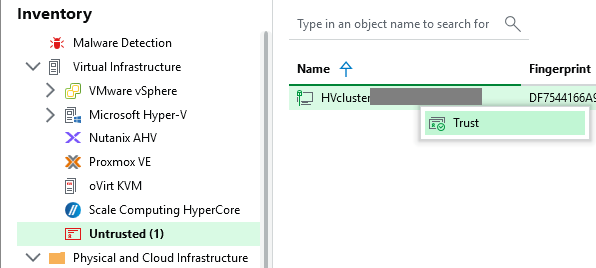
- Inventory - Virtual Infrastructure - Untrusted
- here we see the infrastructure components that VBR does not trust, we right-click on the Hyper-V cluster and select Trust
Folder name for replicated VMs
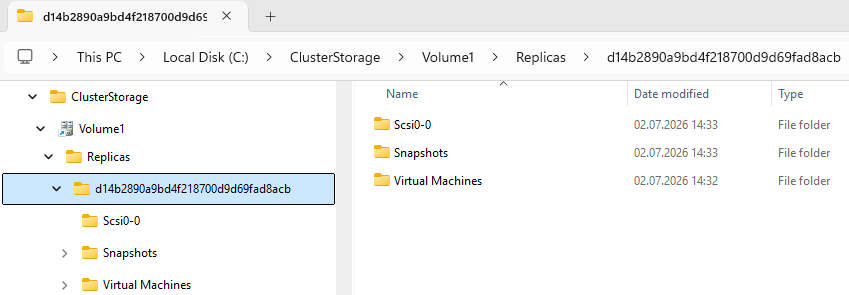
In the replication job we specify the target folder where the files of replicated VMs will be stored. Veeam uses the name Replicas by default, but we can change the path to a folder where we keep our regular VMs. VBR creates a subfolder for each replicated VM in the specified path, whose name is a randomly generated string of 32 characters. For example 84cdd695debf41a4710a49330d932bff.
If we want to have VMs stored in folders with the same name as the VMs themselves, we can do this by manually assigning the path. This must be set up before the first run of the replication job.
- open the replication job settings
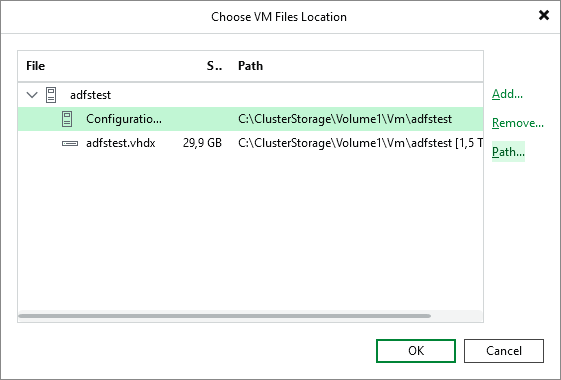
- Destination - click on Pick path for selected virtual disks
- click Add and select (search for) the source VM
- the VM will be added to the list with certain items (configuration files and disks) that have a path specified
- select an item (or select the VM for a shared setting) and click Path
- select the path to the target folder with the VM's name (or create the given subfolder)
- confirm with OK
Notes on the replication job
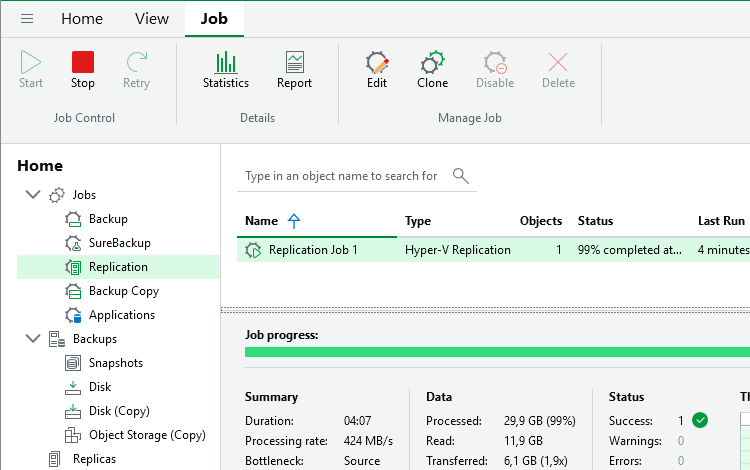
Replication Job
The created job can be found in
- Veeam Backup & Replication Console
- Home - Jobs - Replication
Replicas
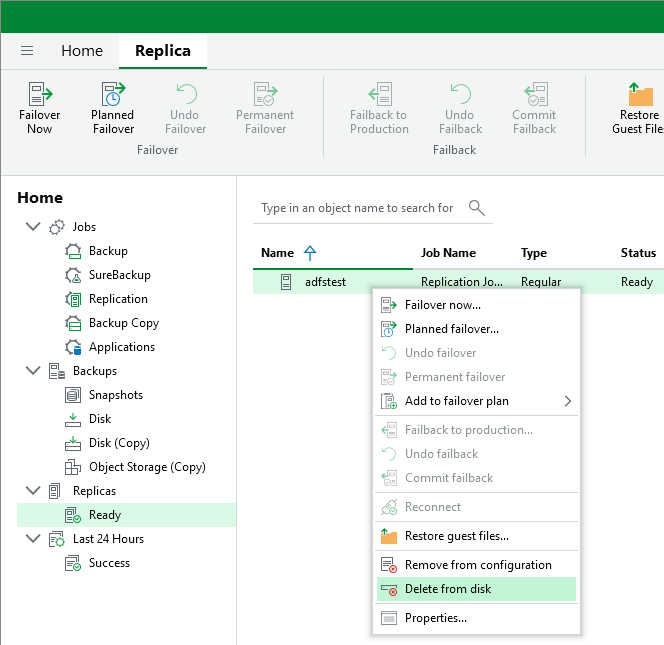
After the first successful run of the job, we will see the prepared replica in
- Veeam Backup & Replication Console
- Home - Replicas - Ready
VM and its files
On the target storage, at the specified path, a folder for the replicated VM is created with additional subfolders where the VM files are placed.
On the target host, the VM is registered in a stopped state.
Veeam license
In Veeam Backup & Replication, a license is consumed (according to the number of replicated VMs) if the VM was not backed up (i.e. had not yet consumed a license). If we perform a Permanent failover, the license is released again.
Deleting a replica
A replica can be deleted (either just from the configuration or from disk). When deleting from disk, the replicated folder on the target storage is removed, and the information about the replica that took place is removed from the configuration. The VM remains in the job, and a new replica will be created on the next run. The VM will also be removed from the target host (Hyper-V server), but on SCVMM it will remain in the Missing state and needs to be deleted.
- Veeam Backup & Replication Console
- Home - Replicas
- right-click on the given replica and select Delete from disk
- confirm the deletion with the Yes button
Failover - switching to the replica (backup system)
Veeam has a Failover function for switching a virtual machine from the source host to the replica. Two variants are available.
Failover now
Immediate startup of the replica. Used for emergency situations when the source VM is not running. Changes on the replica are not reflected on the source VM.
We must complete the Failover using one of the following options:
- Undo failover - return to the original VM, discarding changes on the replica
- Failback to production - return to the original VM, sending changes made on the replica to the production VM
- Permanent failover - permanent switch to the replica, removes snapshots, removes the VM from the job and the replica from the VBR configuration
Planned failover
Planned switchover during maintenance or migration with minimal downtime and no data loss. Changes on the replica are not reflected on the source VM.
Switchover process:
- performs an incremental synchronization (replication)
- shuts down the source VM
- performs a final incremental synchronization
- starts the replicated VM (even if the source was shut down)
We must complete it the same way as a regular Failover, using Permanent failover, Undo failover, or Failback to production.
There are no comments yet.