
Note: The description in this article was tested on Veeam Backup & Replication 13.0.2, licensed using the Veeam Universal License (VUL), i.e. the equivalent of Enterprise Plus.
This article builds on the information provided in Veeam Backup & Replication - Replication Job.
VM Migration
Migrating a Hyper-V VM between different hosts or clusters can be done using Hyper-V's own tools. Often even without downtime, as with Live Migration. But there are situations where we cannot use these options. That's when it's useful to have Veeam Backup & Replication.
For VMware, there is a dedicated special feature, Quick Migration for VMware vSphere. In general, we can use VeeamZIP (which does not consume licenses). But for Hyper-V, it is most convenient to use VBR replication.
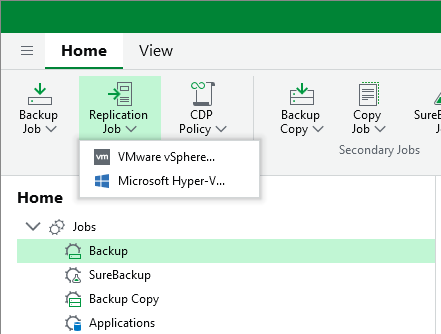
Brief procedure for migration using replication
- we create a
Replication Job, into which we add the source VM we want to migrate - (optionally) we shut down the source VM
- we let the job run once so that a replica is created (a copy of the VM is made)
- we perform a
Planned failover(for a running VM) orFailover now(for a shut-down VM), i.e. switching to the replica (the migrated VM) - we complete the migration using
Permanent failover - we delete the source (original) VM
- if the VM was backed up, we adjust the backup job
Notes on the migration process
Running or shut-down VM
We can perform the migration while the VM is running, but during Failover there will be a downtime of a few minutes (a typical VM in my environment was unavailable for 2 to 3 minutes, depending on the disk size). This happens when the source VM is shut down and the final synchronization of changes is performed, so that no data is lost. And before the replica starts up.
Or we can shut down the source VM in advance, so that all data is consistent. The downtime may be roughly twice as long (around 6 minutes) or nearly the same. During a Planned failover, even for a shut-down VM, synchronization of changes is performed (twice), even though no change could have occurred on the shut-down VM. This can add, for example, 3 minutes to the switchover time. The solution is to use Failover now, which starts the replica immediately, instead of Planned failover.
Multiple VMs in one job
We can add multiple VMs to a replication job. Replication then runs in parallel across multiple VMs, depending on our infrastructure's settings. The created replicas are shown separately (they are not grouped within the job, unlike with backups).
We can start Failover on multiple replicas at the same time, but Planned failover proceeds sequentially, one at a time (more precisely, replication of changes proceeds one VM at a time). Failover now runs in parallel within a few seconds, so here too everything is considerably faster.
Replication job
We generally described the creation of a Replication Job in the previous article. Here we will only give a few notes for the situation where we are dealing with migration between two Hyper-V clusters located at the same site and using the same networks. We want the replicated VM to be identical to the source.
All the necessary components have been added to the VBR backup infrastructure, including the source and target Hyper-V clusters (or SCVMM servers).
- Virtual Machines - we add one or more VMs to the job that we want to migrate
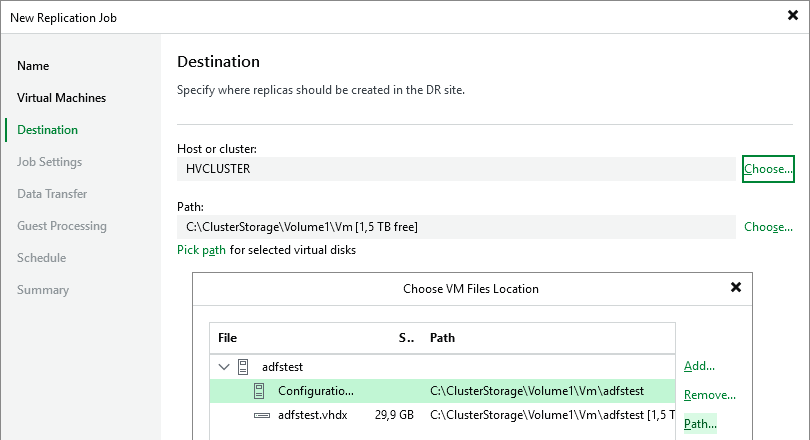
- Destination - we select the target cluster and the path where we keep our VMs, we use Pick path, where we Add the VMs being migrated (search for them), select the VM, and look up the Path to the target folder (on the CSV)
- Job Settings - we choose a (temporary) repository, delete the Replica name suffix, for Restore points, theoretically 1 is enough, but it's probably better to use 3 or more (during Planned failover, 2 additional snapshots are created)
- depending on our needs, we consider whether to use Guest Processing, or not worry about consistency, or shut down the source VM before migration (so that it will be fully consistent)
- Schedule - we don't need to schedule the job, we run it manually
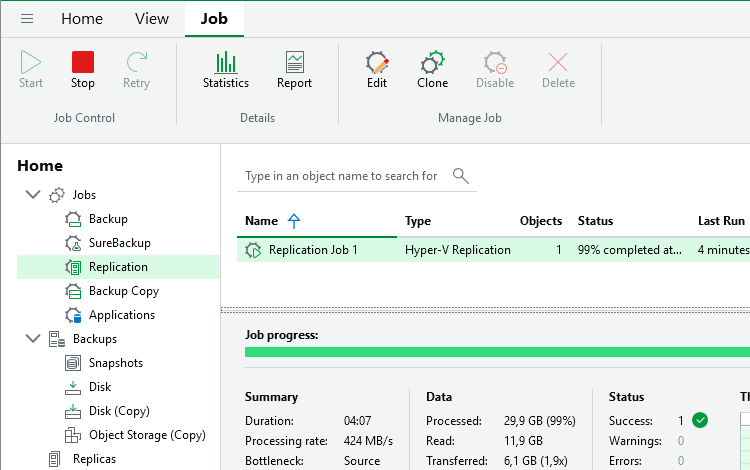
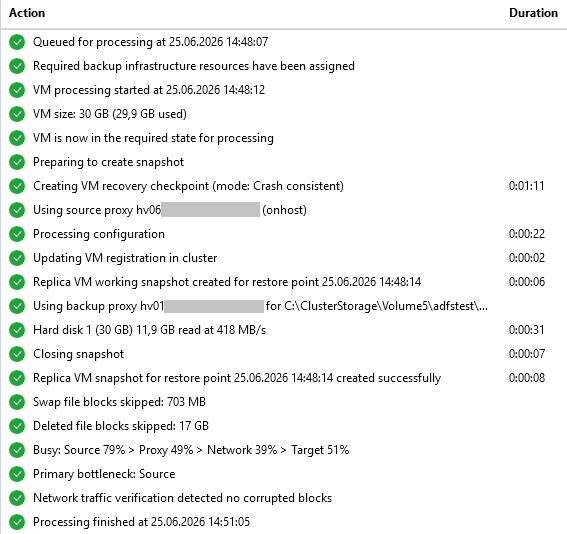
Starting the job
- Veeam Backup & Replication Console
- Home - Jobs - Replication
- we right-click on the job and select Start
Switching to the migrated VM (replica)
If the source VM is running, we use Planned failover. If the VM is shut down, it is considerably more efficient to use Failover now. In both cases we finish using Permanent failover.
Planned failover
- Veeam Backup & Replication Console
- Home - Replicas - Ready
- we right-click on the given replica and select Planned failover
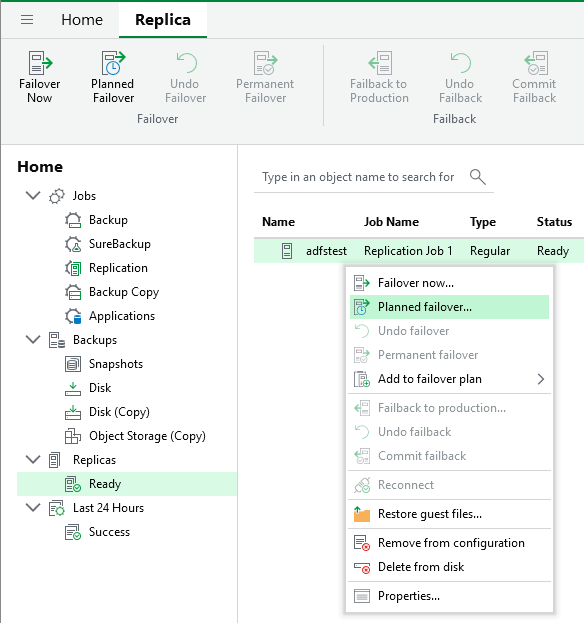
- in the short wizard we confirm the VM and the Restore Point, continue with Next and Finish
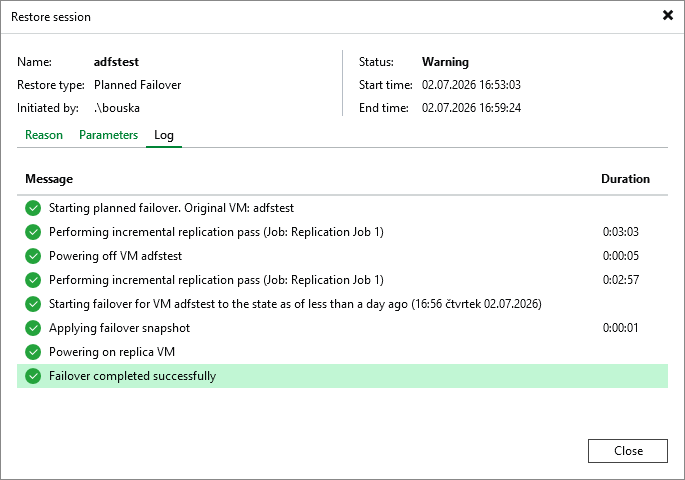
- an incremental replication is performed
- the source VM is shut down (if it was running)
- an incremental replication is performed again
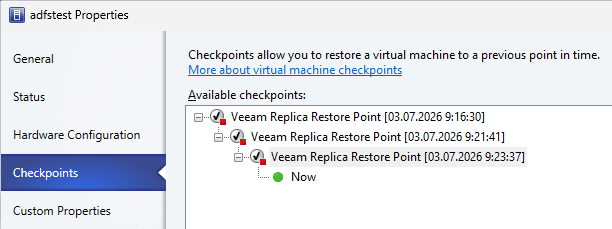
- Failover begins, and the Failover Snapshot is applied
- the replicated VM is powered on (the downtime is the time between shutting down the original VM and powering on the replicated VM, in my case about 3 minutes)
Failover now
- Veeam Backup & Replication Console
- Home - Replicas - Ready
- we right-click on the given replica and select Failover now
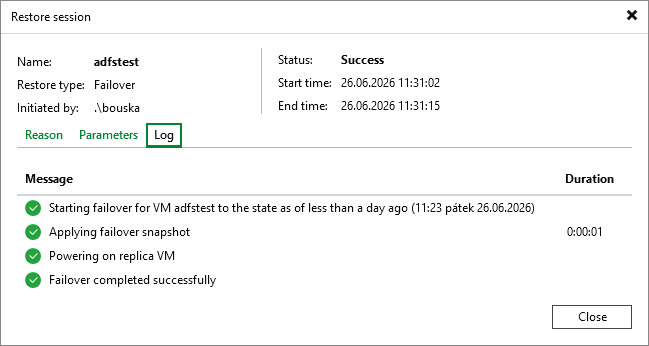
- in the short wizard we confirm the VM and the Restore Point, continue with Next and Finish
- Failover begins, and the Failover Snapshot is applied
- the replicated VM is powered on
Permanent failover - completing the switchover
- Veeam Backup & Replication Console
- Home - Replicas - Active
- we now see that the replica is active, in the Failover state
- we right-click on the replica and select Permanent failover
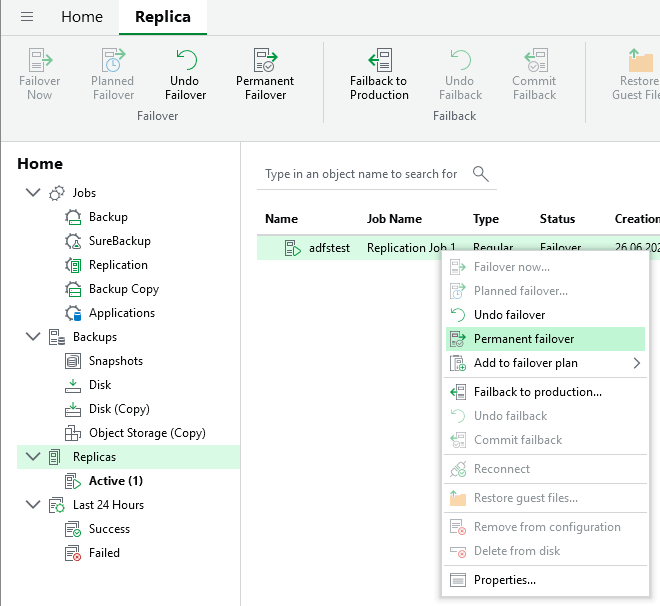
- we confirm that we can proceed with the permanent switchover, Yes
- the snapshots (checkpoints) are removed on the target VM
- the VM is removed from the Replication Job, and the information about the replica is removed from the VBR configuration
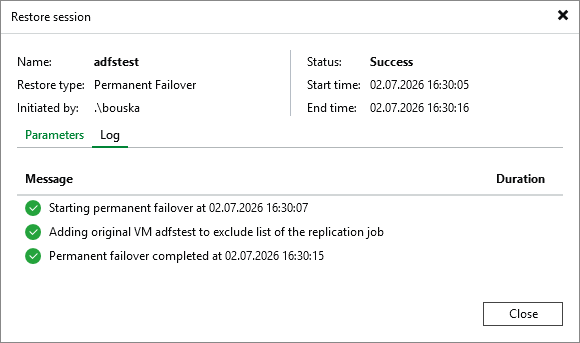
Completion
Removing the original VM
The shut-down original VM is now located on the source Hyper-V cluster. We thoroughly test that the replicated VM works correctly. Then we delete the original VM. If we use System Center Virtual Machine Manager (SCVMM), we use its console for the deletion.
Backup adjustments
If the VM was backed up, we must modify/create a standard Backup Job with the VM on the new cluster and remove the original VM. At that point, we will be consuming 2 Veeam licenses. We can revoke the license for the original VM.
There are no comments yet.